How to Build a Minimum Viable Product: A Step-by-Step Guide
So you’ve got a great idea for a product or service? That’s excellent! But before you dive into months of development and invest your life savings, let’s talk about how to build a Minimum Viable Product (MVP) to test your idea in the real world. This practical guide will walk you through the process step by step, helping you avoid common pitfalls and set yourself up for success.
Step 1: Clarify Your Core Problem and Solution
Identify the Problem Worth Solving
Every successful product solves a meaningful problem. Before writing a single line of code or designing any interface, get crystal clear about:
- What specific problem are you solving?
- Who experiences this problem most acutely?
- How do people currently solve this problem?
- Why are existing solutions inadequate?
Don’t skip this foundational step. Many products fail not because they’re poorly built, but because they don’t address a real problem people care enough about.
Talk to Potential Users
Don’t just guess what people need—ask them directly. Conduct at least 10-15 interviews with potential users who fit your target profile. During these conversations:
- Ask open-ended questions about their current challenges
- Have them walk you through how they currently handle the problem
- Listen for emotional responses—frustration, annoyance, or excitement can signal areas of opportunity
- Pay attention to workarounds they’ve created—these are gold mines for product insights
PayPal co-founder Max Levchin once said, “The very first version of PayPal was built in two weeks because all we were trying to do was answer the question: Will people use this thing?” This user-first mindset is crucial.
Define Your Unique Value Proposition
Based on your research, craft a clear statement that explains:
- What your product does
- Who it’s for
- How it’s different from alternatives
- Why someone should care
For example, when Spotify was developing their MVP, they weren’t just “a music service”—they were “a legal, on-demand streaming service that lets music fans play any song they want instantly without having to own or download files.”
Step 2: Outline Your MVP Scope
List All Possible Features
Start by brainstorming every feature you could potentially include. Don’t hold back at this stage—list everything from must-haves to nice-to-haves to future possibilities. This comprehensive view helps ensure you’re not overlooking anything important.
Use the MoSCoW Method to Prioritize
Now comes the critical part—ruthless prioritization. Categorize each feature as:
- Must-have: Features without which the product simply doesn’t work
- Should-have: Important features that aren’t absolutely critical for launch
- Could-have: Desirable features that could be sacrificed if necessary
- Won’t-have: Features explicitly left for future versions
Remember, a true MVP isn’t just a stripped-down version of your complete vision—it’s the smallest thing you can build that lets users experience your core value proposition.
Create User Stories for Must-have Features
For each must-have feature, create a simple user story that follows this format: “As a [type of user], I want to [perform an action] so that [benefit/result].”
For example: “As a busy professional, I want to schedule social media posts in advance so that I can maintain an active presence without interrupting my workday.”
These user stories help keep development focused on actual user needs rather than technical specifications.
Define Your Success Metrics
What signals will tell you if your MVP is successful? Define 3-5 key metrics that directly relate to your business goals, such as:
- Signup rate
- User activation (completing key actions)
- Retention after 1 day/1 week/1 month
- Time spent using the product
- Referral rate
- Willingness to pay
Airbnb’s early success metric wasn’t complex—it was simply whether people would book rooms in strangers’ homes. This clear focus helped them validate their core concept quickly.
Step 3: Design Your MVP Experience
Create a User Journey Map
Map out the entire experience from when users first discover your product to achieving their desired outcome. This visual representation helps identify potential friction points and ensures you’re not missing critical steps in the user experience.
Your map should include:
- Entry points (how users discover your product)
- Onboarding process
- Core functionality interactions
- Success moments
- Potential exit points
Design Simple Wireframes
Sketch out the key screens or interactions needed to support your user journey. Keep these wireframes purposely low-fidelity at first—use paper, whiteboard, or simple digital tools.
The goal isn’t pixel-perfect design but rather to visualize the user flow and essential elements. As Jeff Bezos says, “Good inventors and designers deeply understand their customer. They spend tremendous energy developing that intuition.”
Create a Simple Prototype
Turn your wireframes into an interactive prototype that simulates the basic user experience. Tools like Figma, Adobe XD, or even PowerPoint can help create clickable prototypes without writing code.
Test this prototype with 5-8 potential users, asking them to complete key tasks while thinking aloud. Watch for confusion, hesitation, or mistakes—these highlight areas that need refinement before development.
Define Your Technical Architecture
Outline the basic technical components needed to support your MVP. Consider:
- Front-end technologies
- Back-end requirements
- Data storage needs
- Third-party services you can leverage (authentication, payments, etc.)
- Scalability considerations (but don’t over-engineer)
Choose technologies that balance speed of development with your team’s expertise. Many successful startups began with simple tech stacks and evolved them as they grew.
Step 4: Build Your MVP
Set Up Your Development Environment
Establish the tooling and workflows your team will use:
- Code repository (like GitHub or GitLab)
- Development, staging, and production environments
- Continuous integration/continuous deployment (CI/CD) pipeline
- Bug tracking system
- Communication channels for team collaboration
Having these fundamentals in place helps prevent technical debt and miscommunication during development.
Adopt Agile Development Practices
Break development into short sprints (1-2 weeks) with clear deliverables. This approach allows for regular evaluation and course correction. Key practices include:
- Daily standup meetings to share progress and obstacles
- Sprint planning to prioritize upcoming work
- Sprint reviews to demonstrate completed features
- Retrospectives to improve your process
Spotify, known for its innovative engineering culture, built its early versions through rapid iteration cycles focused on delivering value quickly rather than perfection.
Focus on Functional Over Beautiful
At the MVP stage, functionality trumps aesthetics. While your product shouldn’t look terrible, investing too much in visual polish before validating your core concept is a common mistake.
Ugly but functional is better than beautiful but useless. The original Craigslist, with its famously bare-bones design, proved that users will tolerate basic aesthetics if the core value is strong enough.
Implement Analytics From Day One
Integrate analytics tracking before launch to capture usage data from the beginning. Focus on tracking:
- User acquisition paths
- Feature usage frequency
- Completion rates for critical flows
- Time spent in the application
- Error or drop-off points
This data will be invaluable for guiding post-launch improvements.
Build in Feedback Mechanisms
Make it easy for users to share their thoughts directly within your product:
- Simple feedback forms
- In-app chat support
- Feature request capabilities
- User testing session invitations
These direct feedback channels complement your quantitative analytics with qualitative insights.
Step 5: Test Internally Before Launch
Conduct Thorough Testing
Before exposing your MVP to real users, ensure it’s stable enough for basic usage:
- Functional testing of all critical user paths
- Cross-browser/device compatibility checks
- Performance testing for acceptable load times
- Security testing for basic vulnerabilities
- Usability testing with team members not involved in development
GitHub co-founder Tom Preston-Werner notes, “You’re better off with a kick-ass half than a half-assed whole.” Your MVP doesn’t need to be perfect, but it should be functional enough to provide a realistic test of your concept.
Prepare for Launch Scenarios
Anticipate potential issues and have contingency plans ready:
- How will you handle unexpected technical problems?
- What’s your plan if usage exceeds expectations?
- How will you respond to critical user feedback?
- Do you have backup systems for essential functionality?
This preparation helps you respond confidently when inevitable surprises occur.
Step 6: Launch and Learn
Choose the Right Launch Strategy
Your MVP doesn’t need a massive public launch. Consider these approaches:
- Private beta: Invite-only access for a small group of friendly users
- Waiting list: Generate interest with limited access and gradual onboarding
- Geographical limitation: Launch in a single location or market
- Feature limitation: Launch with core functionality and a clear roadmap
Buffer, the social media management platform, started with a simple landing page describing the concept and collected email addresses to gauge interest before building anything.
Collect and Analyze User Feedback
Actively gather feedback through multiple channels:
- Direct interviews with early users
- Survey responses
- Support conversations
- Social media mentions
- Analytics data on feature usage
Look for patterns rather than reacting to individual comments. What are the most common pain points? Which features are being used most? What’s being ignored?
Measure Against Your Success Metrics
Remember those success metrics you defined earlier? Now’s the time to measure your performance against them. Be honest about what the data tells you—the purpose of an MVP is learning, not validation of your assumptions.
Decide on Next Steps
Based on your learnings, choose your path forward:
- Persevere: Continue developing based on your current direction
- Pivot: Make a fundamental change to your product strategy
- Pause: Take time to reconsider your approach before proceeding
- Proceed with caution: Continue but with specific changes to address issues
Instagram began as Burbn, a location-based check-in app similar to Foursquare. When their MVP data showed users were primarily using the photo features, they pivoted to focus exclusively on photo sharing—a decision that led to enormous success.
Step 7: Iterate and Improve
Prioritize Improvements Based on Data
Use your analytics and feedback to create a prioritized list of improvements:
- Fix critical bugs and usability issues first
- Address the most commonly requested features
- Enhance areas with the highest usage
- Experiment with new ideas in areas with low engagement
Remember that data should inform but not dictate your decisions—balance user feedback with your vision and business goals.
Implement Changes Incrementally
Avoid the temptation to overhaul everything at once. Instead:
- Make smaller, frequent updates
- Test changes with a subset of users when possible
- Monitor the impact of each change on your key metrics
- Be prepared to roll back changes that don’t work
This incremental approach reduces risk and provides clearer feedback on what’s working.
Revisit Your Product Roadmap
As you learn from your MVP, continuously update your product roadmap:
- Which assumptions have been validated or invalidated?
- Have user priorities shifted?
- What unexpected opportunities have emerged?
- How have market conditions changed?
Dropbox founder Drew Houston advises, “Don’t worry about failure; you only need to be right once.” Your MVP is just the beginning of an ongoing process of learning and adaptation.
Common MVP Pitfalls to Avoid
Feature Creep
The single biggest MVP killer is adding “just one more feature” before launch. Combat this by:
- Posting your MVP feature list visibly for all team members
- Requiring strong justification for any additions
- Setting a firm launch date and working backward
- Remembering that every feature adds complexity and potential bugs
Perfectionism
Accept that your MVP will have rough edges—that’s by design. Reid Hoffman, LinkedIn founder, famously said, “If you’re not embarrassed by the first version of your product, you’ve launched too late.”
Building in Isolation
Continue talking to users throughout the development process. Their feedback during building—not just after launch—helps ensure you’re on the right track.
Ignoring Technical Debt
While speed is important for an MVP, completely disregarding code quality creates problems later. Strike a balance between moving quickly and creating a foundation you can build upon.
Not Having a Learning Mindset
The primary purpose of an MVP is learning, not immediate success. If you view “failure” as valuable data rather than a setback, you’re more likely to eventually find the right product-market fit.
Real-World MVP Success Stories
Zappos
Nick Swinmurn, founder of Zappos, didn’t build a massive e-commerce platform to test whether people would buy shoes online. Instead, he took photos of shoes at local stores, posted them online, and when orders came in, he would buy the shoes from the stores and ship them himself. This simple approach validated his concept before investing in inventory and infrastructure.
Groupon
Groupon’s MVP was astonishingly simple—a WordPress blog with PDFs of deals, manually emailed to subscribers. They didn’t build complex systems for merchant management or payment processing until they confirmed people would actually buy local deals online.
Dropbox
Instead of building a complete sync service (which would have taken months), Dropbox created a 3-minute video demonstrating how their product would work. This video generated 70,000 email signups overnight from people interested in the concept, validating demand before writing much code.
Slack
Slack began as an internal communication tool for a game development company. They used it themselves for months, refining it based on their own team’s needs before ever considering it as a standalone product. This “dogfooding” approach ensured they solved real problems before launching publicly.
Final Thoughts: Beyond the MVP
Your MVP is just the beginning of your product journey. As Eric Ries, author of “The Lean Startup,” explains: “The minimum viable product is that version of a new product which allows a team to collect the maximum amount of validated learning about customers with the least effort.”
Once you’ve collected that learning, the real work begins—turning those insights into a product that delights users and builds a sustainable business. Remember that many of today’s most successful products started with humble beginnings:
- Twitter began as a simple SMS service for internal team communication
- Amazon only sold books for years before expanding
- Facebook was initially limited to Harvard students only
- YouTube started as a video dating site
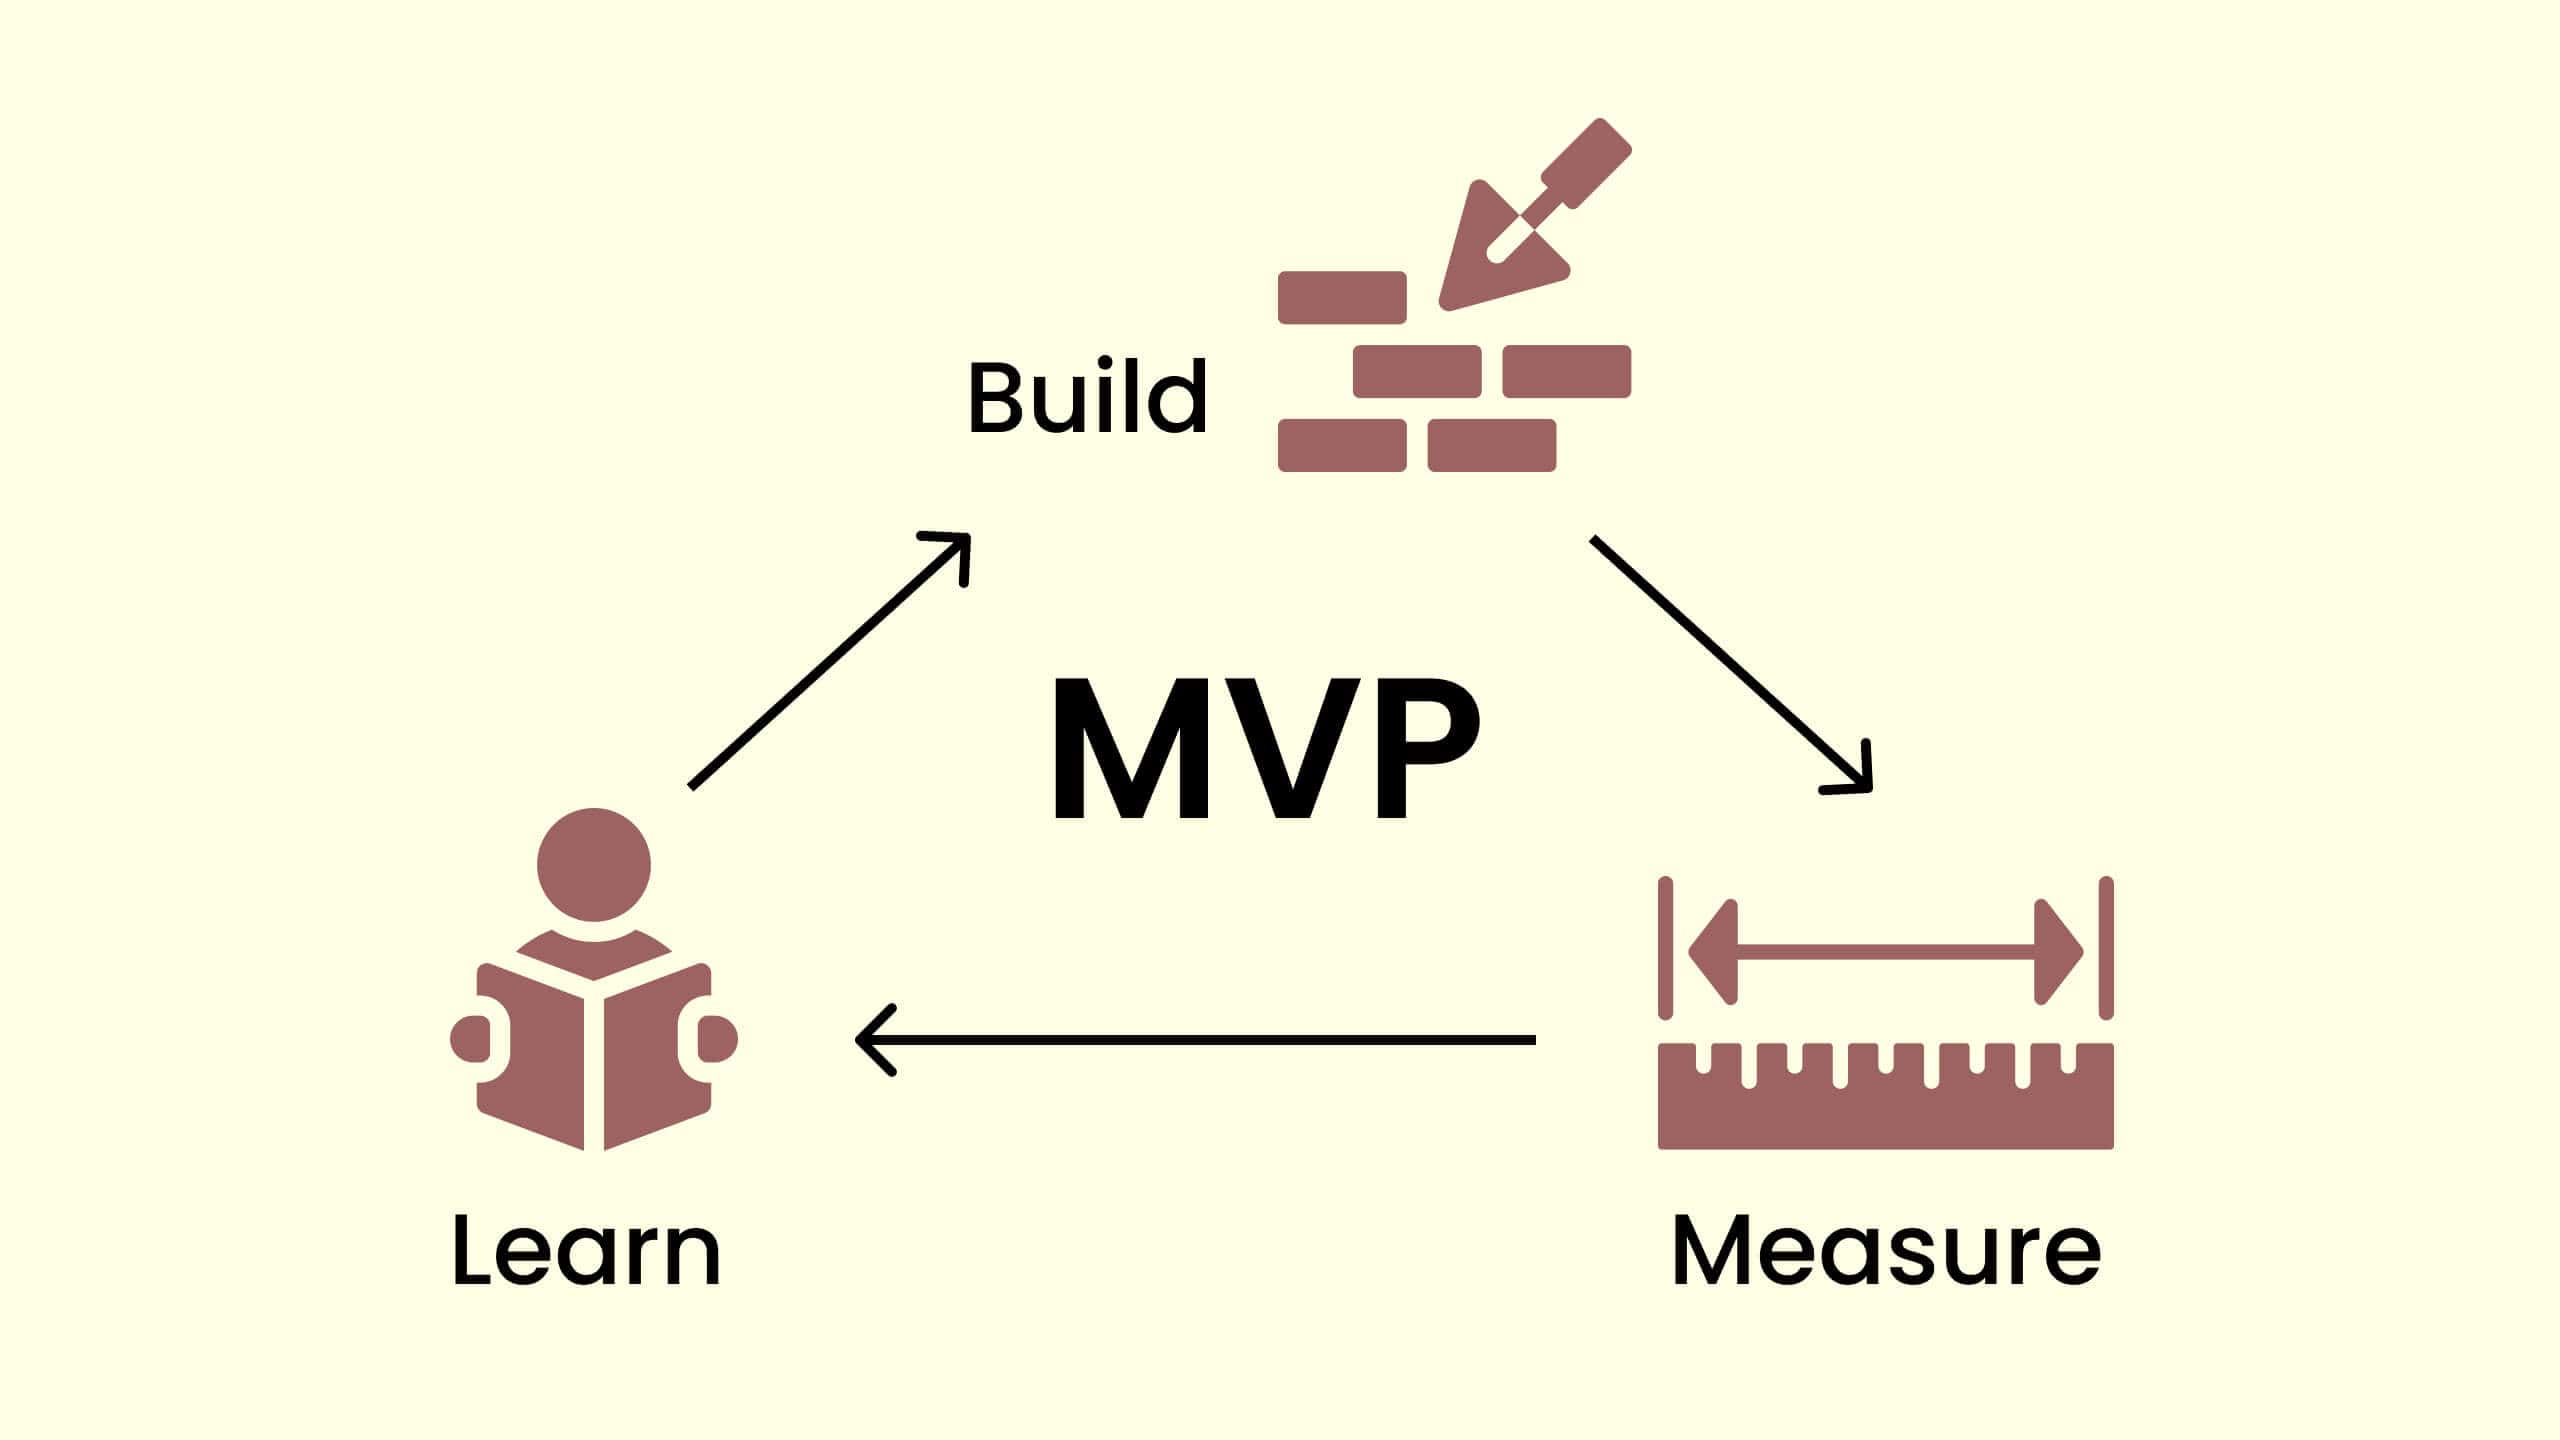
The path from MVP to successful product isn’t linear, but the principles remain the same: build, measure, learn, and adapt. Stay close to your users, make data-informed decisions, and remain flexible enough to evolve as you discover what truly resonates.
By following this step-by-step guide, you’ll maximize your chances of building an MVP that leads to valuable insights—and potentially a successful product that makes a real difference for your users. Good luck on your journey!